Creating excellence in root canal preparation is a blend of many processes, three of which are vitally important: irrigation, canal negotiation, and instrumentation. A lack of efficiency in any one of these areas puts the whole process at risk. For example, debris left in the middle third that is not irrigated or removed through instrumentation or a combination of the two can easily be pushed apically, and as a result can lead to uncleaned and unfilled space within the canal system and iatrogenic canal blockage.
This article discusses strategies for general practitioners that promote excellent cleaning and shaping in root canal systems while avoiding potential iatrogenic events (ledges, perforations, blockages of all types, etc).
The Starting Point
As a starting point, it is essential for the clinician to have a clear idea what the final endodontic result should look like before beginning the procedure. Specifically, the clinician should carefully evaluate the initial radiographs preoperatively for case difficulty (curvature, root length, calcification, access through a crown, previous access, the presence of previous iatrogenic events, among many important considerations). In addition, the clinician should anticipate the challenges that such initial findings will impose. Creating such a mental image can go far toward reducing untoward results, and when indicated, motivate the clinician toward referral to a specialist as appropriate.
Once accessed, all things being equal, the pulp chamber should be flooded with sodium hypochlorite in a nonvital case and a viscous EDTA gel in a vital case. A viscous EDTA gel such as File-Eze (Ultradent Products) or Glyde File Prep (DENTSPLY Maillefer) can emulsify the pulp and hold it in suspension. This can prevent (as much as possible) having the pulp “pistoned” into the apical third of the root, where it might form a blockage that, in the worst case, cannot later be bypassed. From the very beginning of the process it is essential for the clinician to immediately irrigate out all of the debris that might form as the result of instrumentation, especially from rotary Ni-Ti files (RNT) files because of how quickly a large volume of dentin chips are produced with their use. As a result, it is vital to replenish irrigating liquids in the canal, ideally after every file.
It is noteworthy that when a RNT file comes out of the canal it is common to have the exiting file remove all or most of the irrigant from the canal. The canal and chamber must be replenished with irrigant to prevent future debris from being compacted apically, to float debris out of the canal, to dissolve remaining pulp, and to kill bacteria to the greatest extent possible.
During access not all orifices are the same, and as such their management can vary depending on diameter. For example, some have a lumen of such a diameter that they can be easily negotiated and instrumented, especially with orifice openers. Others may require a large degree of negotiation with small hand files to just get a “toehold” into the canal. Recognizing when a canal can be entered with a small hand file and when it should be entered with an orifice opener is a significant skill that can be enhanced with experience. In short, it is helpful to err on the side of caution in the placement of an orifice opener into a canal that ideally requires significant negotiation with a hand file; this could be the harbinger of a blocked orifice and possible subsequent perforation.
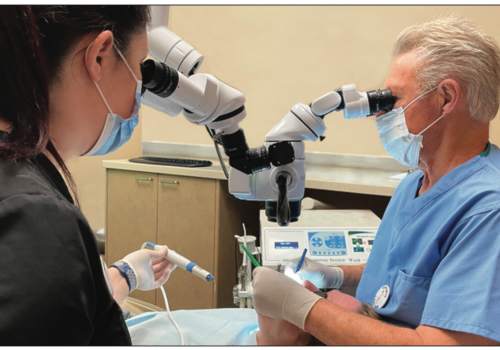
A surgical microscope is invaluable with small orifices to aid in both canal location and initial negotiation with small hand files. In especially narrow canals it may take a substantial number of small K-Files (6s to 8s) to open up the canal to a degree where it would be appropriate to place a RNT orifice opener. A RNT orifice opener might not be brought into the canal until the canal has been opened to the equivalent of at least a size 15 K-File and the canal has been irrigated as well as possible of all debris within and at the orifice.
Caution is urged when the clinician is making access through a crown and is unable to see the pulp chamber radiographically. Even with a radiograph, one cannot easily discern whether the chamber is severely calcified or easily negotiable. Such crowns are a definite risk factor for subsequent perforation, especially without a surgical microscope.
FOLLOWING ACCESS
 |
 |
|
Figure 1. K3 orifice openers. |
Figure 2. Separation caused by instrumenting without a true working length and without a rubber dam. |
Once access is made and the clinician has removed all caries, overhanging unsupported tooth structure, coronal restorations, etc and the orifices to the various canals are located, it is important to place irrigant immediately into the chamber. If, after access, the tooth does not have 4 walls to hold irrigant, the clinician might consider placing composite around the tooth to create 4 walls to build a reservoir of irrigant that can act as a source of fresh solution and prevent irrigant from spilling over and possibly getting under the rubber dam.
Once the orifice is located and evaluated, in the most general terms a large orifice can be entered with orifice openers such as K3 Shapers (SybronEndo). The K3 Shapers come in 3 tapers—.12, .10, and .08—and are used from largest to smallest taper. The K3 Shapers are all size 25 at their tips (Figure 1). Such an approach provides a crown-down entry into the tooth that allows each successive Shaper to enter the canal at a deeper level. In the most general terms it is desirable to instrument the coronal third first, middle third second, and apical third last.
Caution is advised for those canals that may exit the pulpal floor at an acute angle and as such place a significant torsional force on the file as well as put the file at risk of cyclic fatigue failure. This is similar to the phenomenon that causes a paper clip to break when it is bent repeatedly at the same place. Such bending puts the metal under tension on one side and compression on the other, leading to microcracks and ultimately failure. Empirically, in the author’s experience this angulation of canal exit from the pulpal floor predisposes the files to failure and occurs most commonly in upper second molar mesial-buccal roots. This can be avoided by a very careful negotiation of canals with small hand files (6s to 10s) to ensure canal patency along the whole length of the canal, as well as subsequent creation of a glide path (the canal is opened to a size 15 K-File). Aside from reducing file breakage, opening the orifice up carefully in such a constricted canal can lead to better visualization of the canal as well as placement of files into the orifice with greater control. Placement of larger volumes of irrigant into the canal earlier in the process is also a positive by-product of this approach to treatment.
With crown-down instrumentation as a guiding philosophy, it is important (especially in a curved canal) to work only in the intended third of the canal and only instrument in a canal in which more coronal third has already been shaped. In essence, one is not in the middle third of a root where the coronal third has not been properly shaped. The worst-case scenario is for the clinician to be working in the apical third of any canal, especially with a RNT, without the determination of true working length, without a glide path, or without optimal irrigation (Figure 2). Restrictive dentin higher up in the canal can easily bind the instrument, restrict tactile sense, reduce cutting efficiency, and predispose the case to ledging and possibly file breakage.
Removing the cervical dentinal triangle in the process of orifice management, as well as removal of chips via copious irrigation at each stage of the process, create better visibility and efficiency. Such coronal third management is vital at this stage of the canal preparation and creates the possibility of excellent cleansing and shaping in the middle and apical thirds. Alternatively, if the management of the coronal third is less than ideal, cleaning and shaping in the apical third is unquestionably compromised.
PROPER IRRIGATION
Irrigation, be it in the coronal, middle, or apical third, has many common characteristics. First, irrigation is always passive; the needle is never bound. There is no literature-based consensus as to the ideal volume of irrigant to use for optimal canal cleanliness. Empirically, the author will use 70 to 150 cc of 5.25% sodium hypochlorite for an average molar, delivered through a side-venting, close-ended Ni-Ti needle. The motion of irrigant placement is very slow and deliberate, and the tip of the needle can, if desired, be placed against the canal walls to dislodge any adherent debris that resists being floated out. This is one of the many stages within the process of a root canal where the use of a surgical microscope has great value. Through the surgical microscope the clinician can see all of the debris that might be left in a canal and can direct future irrigation efforts to specifically direct the removal of whatever debris might be visualized.
From the time that the bulk of the pulp is removed from the canal, the author will leave the sodium hypo-chlorite in the canal for approximately 30 minutes for the maximal bactericidal effect. There is evidence to justify heating the irrigant and also ultrasonically activating it as well.
The author employs 5.25% sodium hypochlorite instead of a more diluted solution because dilution would require the mixing of solutions with possible spills, and there is no clear advantage to a more diluted concentration.
In addition to sodium hypochlorite, the clinician can employ 2% chlorhexidine (Vista Dental) in a manner similar to sodium hypochlorite for its antibacterial action. The only drawback of chlorhexidine is that the solution does not dissolve pulp tissue. This limitation aside, the solution has significant value with regard to its use in certain clinical situations such as open apices and those cases where either less than optimal suction or rubber dam isolation may limit the utility of sodium hypochlorite.
 |
|
Figure 3. Clinical case accomplished in the manner described. |
Chlorhexidine is not mixed with sodium hypochlorite because of the precipitate that forms. A liquid EDTA solution has value in that it can be used for 2 primary functions (arbitrarily chosen by the author). It can be used to clear chlorhexidine or sodium hypochlorite from the canal before the introduction of the other solution, or a liquid EDTA can be used to clear the smear layer before the placement of bonded obturation. A liquid EDTA solution can also be used for flushing debris, and if desired, as a chelator in a calcified canal or as a canal lubricant. The author uses SmearClear combined with RealSeal (both SybronEndo) to clear the smear layer and bond the obturation, respectively. Smear-Clear is chosen because it contains both an antimicrobial component and a surfactant that decreases the surface tension of the solution and allows greater penetration
of the dentinal tubules. Bonded obturation is associated with a decreased amount of potential microbial leakage in a coronal to apical direction1-13 (Figure 3).
CYCLE OF INSTRUMENTATION
The cycle of instrumentation, irrespective of the canal third being treated, is one of negotiation with small K-Files (6s to 10s), patency assurance (ie, creation of patency: the canal is open and negotiable to the minor constriction of the apical foramen), creation of a glide path (the canal is open to a size 15 K-File), RNT use (ideally from larger taper and larger tip-sized instruments to smaller), and irrigation (as described above), and then recapitulation. Recapitulation is passing a small K-File through the previously instrumented canal to ensure that the canal path is open, that once achieved the patency of the canal is maintained, and that debris is not accumulating apically or blocking the canal.
CONCLUSION
Blending irrigation, canal negotiation and instrumentation can create ideal endodontic results if each of these steps is carried out diligently and in a logical and sequential order, optimally with the coronal third treated first, middle third second, and apical third last.
References
- Stratton RK, Apicella MJ, Mines P. A fluid filtration comparison of gutta-percha versus Resilon, a new soft resin endodontic obturation system. J Endod. 2006;32:642-645.
- Gambarini G, Pongione G. Apical leakage of a new obturation technique. J Endod. 2005;31:Abstract 42.
- Alongi DJ, Caicedo R, Moiseyeva R, et al. Interfaces in soft resin obturated root canals. Presented at: The IADR/AADR/CADR 83rd General Session & Exhibition; March 9-12, 2005; Baltimore, Md. Abstract 2855. Available at: http://iadr.confex.com/iadr/2005Balt/techprogram/abstract_62051.htm. Accessed June 15, 2007.
- Tay FR, Loushine RJ, Weller RN, et al. Bonding of self-etching primer/polycaprolactone-based root-filling material to intraradicular dentin. Presented at: The IADR/AADR/CADR 83rd General Session & Exhibition; March 9-12, 2005; Baltimore, Md. Abstract 0283. Available at: http://iadr.confex.
com/iadr/2005Balt/techprogram/abstract_60543.htm. Accessed June 15, 2007. - Jia W, Gagliardi S, Jin S. Bondability of Resilon to a root canal sealant. Presented at: The IADR/AADR/CADR 83rd General Session & Exhibition; March 9-12, 2005; Baltimore, Md. Abstract 0673. Available at: http://iadr.confex.com/iadr/2005Balt/techprogram/abstract_59281.htm. Accessed June 15, 2007.
- Li Y, Zhang W, Onyago O, et al. Antimicrobial potential of Epiphany RCS system. Presented at: The IADR/AADR/CADR 83rd General Session & Exhibition; March 9-12, 2005; Balti-more, Md. Abstract 0677. Available at: http://iadr.confex.com/iadr/2005Balt/techprogram/abstract_59275.htm. Accessed June 15, 2007.
- Benzley LP, Liu JC-H, Williamson AE. Characterization of tubule penetration using Resilon: a soft-resin obturation system. Presented at: The IADR/AADR/CADR 83rd General Session & Exhibition; March 9-12, 2005; Baltimore, Md. Abstract 0684. Available at: http://iadr.confex.com/iadr/2005Balt/techprogram/abstract_63582.htm. Accessed June 15, 2007.
- Shipper G, Orstavik D, Teixeira FB, et al. An evaluation of microbial leakage in roots filled with a thermoplastic synthetic polymer-based root canal filling material (Resilon). J Endod. 2004;30:342-347.
- Teixeira FB, Teixeira EC, Thompson JY, et al. Fracture resistance of roots endodontically treated with a new resin filling material [published correction appears in J Am Dent Assoc. Jul 2004;135:868]. J Am Dent Assoc. May 2004;135:646-652.
- Nahmias Y, Serota KS, Watson WR Jr. Predictable endodontic success: Part II –microstructural replication. Oral Health. December 2003; Available at: http://www.oralhealthjournal.com/issues. Accessed June 15, 2007.
- Mounce R, Glassman G. Bonded endodontic obturation: another quantum leap forward for endodontics. Oral Health. July 2004; Available at: http://www.oralhealthjournal.com/issues. Accessed June 15, 2007.
- Chivian N. Resilon: the missing link in sealing the root canal. Compend Contin Educ Dent. 2004;25:823-826.
- Shipper G, Teixeira FB, Arnold RR, et al. Periapical inflammation after coronal microbial inoculation of dog roots filled with gutta-percha or resilon. J Endod. 2005;31:91-96.
Dr. Mounce lectures globally and is widely published. He is in private practice in endodontics in Portland, Ore. Among other appointments, he is the endodontic consultant for the Belau National Hospital Dental Clinic in Koror, Republic of Palau, Micronesia. He can be reached at (503) 222-2111, Lineker@aol.com, or by visiting MounceEndo.com.


