
For patients just finishing expensive orthodontic treatment, cost is almost always a significant factor in restorative treatment decisions. Direct composite bonding is more conservative because it requires no tooth reduction and it is significantly less expensive compared to porcelain. When it’s done properly, it can look as good or better than porcelain. Herein lies the dilemma for most general dentists with direct composite bonding: How does one properly layer multiple shades of composite, and which composites are best in aesthetic applications?
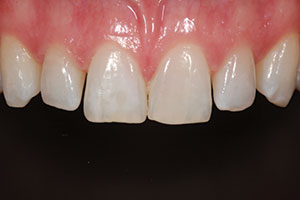
In this case example, the plan was to use direct composite bonding to correct the size discrepancies of teeth Nos. 7 and 10 and spruce up the incisal edges of teeth Nos. 8 and 9 (Figure 1). Alginate impressions were taken to fabricate a diagnostic wax-up. Whether it’s made the old-fashioned way (by hand) or the new-age way (digitally), the diagnostic wax-up is the single most important step for a predictable outcome (for direct and indirect procedures).
Teeth Nos. 7 to 10 were prepared using a prophy cup and pumice slurry to remove plaque, and followed by a light dusting via air abrasion (MicroEtcher II [Zest Dental Solutions]). Estelite Omega composite (Tokuyama Dental America) was used in this case because of its uniformly sized spherical filler, providing excellent optical, handling, and polishing properties. A total-etch protocol was followed, and bonding resin (ExciTE F VivaPen [Ivoclar Vivadent]) was applied, air thinned, and light cured (BluePhase [Ivoclar Vivadent]). The number of layers will vary depending on the individual characteristics of the tooth being restored, but the principles of polychromatic layering remain the same. The most common steps would go in the following order:
 |
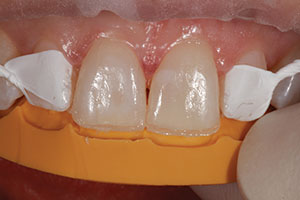 |
| Figure 1. Preoperative view of the smile after Invisalign treatment (Align Technology), showing tooth size and space discrepancies, as well as uneven incisal edges. | Figure 2. Silicone putty index was used to create a thin palatal shelf with a milky-white (MW) shade. |
 |
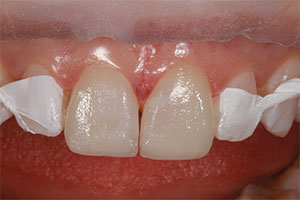 |
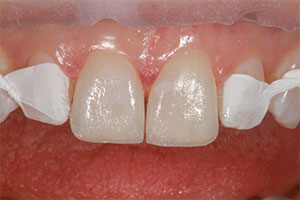
| Figure 3. Dentin shade (DA1). | Figure 4. A clear composite (TRANS) was placed at the incisal tip. |
 |
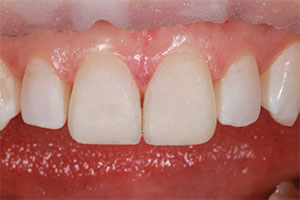 |
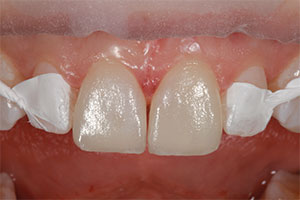
| Figure 5. A dentin shade (EB1) was placed just shy of final contour, and a white resin was used to create internal characteristics. | Figure 6. A final layer of MW was placed to slightly over the final contour. |
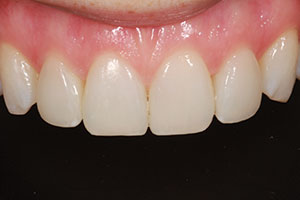 |
| Figure 7. A one-week follow-up image. |
First Layer
A milky-white (MW) semi-translucent palatal shelf using a silicone index as the guide. This shelf acts as the framework upon which all subsequent layers are placed. Do not let this layer feather onto the facial aspect of the tooth preparation. It must be kept thin and well adapted against the palatal cavo-surface margin. The milky-white shade of Estelite Omega is a perfect blend of achromaticity and translucency for replicating the outermost achromatic layer of natural enamel (Figure 2).
Second Layer
Chromatic dentin layer (DA1). This is the most critical layer and the most challenging to learn in this technique because it has to be just the right amount. Too much will result in a bright opaque restoration that reflects too much light, while too little will let more light pass through and leave the restoration gray or low in value. Each brand of aesthetic composite will be a little different as to how it works, and only practice can allow one to become familiar with each material (Figure 3).
Third Layer
A clear or highly translucent composite (TRANS) to accentuate incisal translucency and highlight the dentin mamelons just created in the second layer. This layer is not always needed if the natural teeth you are trying to match do not have any incisal translucency. Also, care must be taken here to not overdo it. Only just enough to fill in the small space from the incisal edge to the mamelons is usually sufficient (Figure 4).
Fourth Layer
Enamel shade (EB1) that is contoured to just shy of the final facial dimension, leaving just enough room for a final MW layer. If there are any color effects you need to add, such as calcification spots, craze lines, incisal halo accentuation, etc, this is when to place it. In this example, a small amount of white resin was applied. In some cases where the tooth is fairly monochromatic, one may use this as the final layer (Figure 5).
Fifth Layer
A final thin layer of MW is contoured to just over the final facial contour, which will provide room for shaping and contouring. This final layer of MW provides a natural depth to the restoration, and, if there were any color effects placed on the fourth layer, this covers them and allows a natural showthrough of those effects. If this final layer is too thick, then the overall value of the restoration will be too low and appear gray (Figure 6).
CONCLUSION
When it comes to restoring anterior teeth with direct composite bonding, this technique can be exceedingly predictable and reproducible. The key is using a diagnostic wax-up to fabricate a silicone putty index that removes the guesswork for length and shape, thereby allowing the dentist to focus on shade selection and application. Estelite Omega is a highly aesthetic composite that makes this layering technique easy to deliver consistent results that last a long time (Figure 7).
For more information, call Tokuyama Dental America at (877) 378-3548 or visit tokuyama-us.com.
Dr. Brown graduated from the University of Washington School of Dentistry in 2006 and practices with an emphasis in conservative restorative and aesthetic techniques in Bellevue, Wash. He is an accredited member of the American Academy of Cosmetic Dentistry and enjoys teaching hands-on courses and writing articles on direct anterior bonding. He can be reached at kbrown@jensenbrowndds.com.


