Dentists have tried to perfect the ultimate way to reproduce the intraoral condition extraorally since the early days of the profession. One only needs to study the development of articulators to gain appreciation for the different theories, and means employed to reproduce mandibular movement on a laboratory bench.1
ERRORS IN PHYSICAL IMPRESSIONS CAN BE COSTLY
Inherent errors exist in the making of an analog impression as well as errors introduced in making the corresponding cast. Dimensional changes, in both the impression material and the stone with which the cast is made, can produce inaccuracies. Even in the best practitioner’s and dental technician’s hands, air bubbles, voids, tears, blood/saliva/other contamination, and distortion due to a variety of causes, can render a hard fought impression unusable. Pinning the dies can make unstable models. Any of these problems can result in extensive adjustments to get the proper occlusal or interproximal fit, or in the worst case, may make the impression worthless. Compounding the problem are issues that may not be readily apparent, only to be discovered in the process of remaking a restoration or appliance.
ADVANCES IN INTRAORAL SCANNING TECHNOLOGIES
Technological alternatives have existed for many years in the form of digital impression systems. The first to market in 1987 was the CEREC 1 (Siemens), which used a 3-dimensional (3-D) scanner and optical powder on the teeth to create a virtual model. The development of the infrared camera (CEREC 1) was one of the first steps in providing the profession with a digital practice experience. For nearly 20 years, CEREC was the only system capable of direct intraoral digital impression making. In addition, with the CEREC system, the practitioner could use CAD/CAM technology to fabricate one visit inlays, onlays, and crowns. Over the years, software and hardware improvements, as well as restorative material improvements have made it easier for the practitioner to make durable and aesthetic one visit CEREC restorations.
OUR PRACTICE EXPERIENCE: INTRAORAL SCANNING
 |
|---|
|
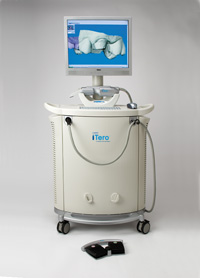
Figure 1. The iTero (Cadent) digital scanner. |
Prior to acquiring the iTero system in February 2008, I used CEREC for virtually all single-unit restorations that were delivered in our practice. However, I continued to take VPS impressions for multiple unit restorations and multiple unit cases. The fact that I was an experienced CEREC user, made the integration of the iTero scanner into my practice easy to accomplish.
iTERO PROCESS
 |
 |
|---|
 |
|---|
|
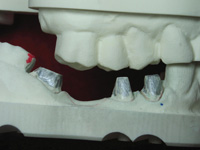
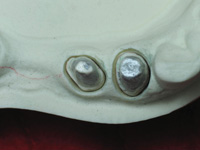
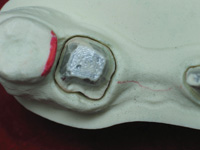
Figures 2 to 4. The milled dies in place. Note the crispness and sharp details of the margins and internal surfaces. |
|---|
| Table. Physical Characteristics of Cadent Polyurethane Model Material 2-4 | |||||
|
The entire process—imaging the preparations and adjacent teeth (including opposing arch and teeth in occlusion)—can be finished in less time than that of a conventional impression. When the operator is satisfied that the required information has been obtained, the completed scans are sent wirelessly to a Cadent facility in Tel Aviv (Israel) where a technician reviews the scans and confirms the margins with the laboratory. From there, the digital file is transmitted to Cadent (New Jersey), where the model is milled from a proprietary blended resin, pinned, trimmed, and articulated; all based on the digital impression created by the clinician. Cadent employs 5-axis industrial milling machines to guarantee the accuracy of the milled models and dies. The models go through no dimensional changes since they are precisely milled from the finished material.
CASE REPORT
 |
|---|
|
Figure 5. Full-mouth radiographs. |
 |
 |
|---|
|
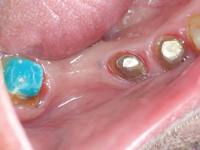
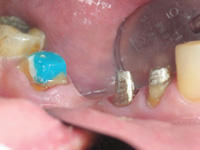
Figures 6 and 7. Preparations of teeth Nos. 28, 29, 31 prior to placement of retraction cord.
|
|---|
Warren is a typical dental avoider who never took the time to care for himself. He endured years of pain, and fracturing teeth in the pursuit of his career. Only because his anterior teeth had an adequate aesthetic appearance was he able to delay his much-needed treatment (Figure 5).
As previously stated, existing disease was controlled (periodontal and endodontic) and cast gold posts and cores were made and seated for teeth Nos. 28 and 29 prior to the final preparation appointment for the mandibular right quadrant. After anesthesia and tooth preparation (Figures 6 and 7) a retraction cord (Gingi-Plain Z-Twist) was placed. I used a black cord, which provides a nice contrast between the tooth and the tissue, enabling me to see the margins and the displacement of the gingiva.
 |
 |
|---|---|
|
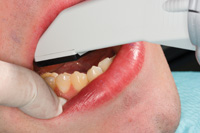
Figure 8. Stock photo of the iTero scanner in place recording images on the patient’s lower right side. |
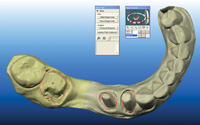
Figure 9. The enhanced quadrant image. |
 |
|---|
|
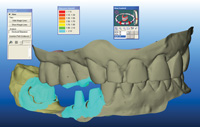
Figure 10. The enhanced image of the arches in occlusion. Color mapping gives the operator an idea of how much occlusal reduction has been achiev |
I next began to scan the prepared arch (Figure 8). (I had chosen the option to scan the opposite arch first. This was done while waiting for the onset of anesthesia.) The system directs you through the process with a series of voice prompts and illustrations to indicate the view of the teeth that it requires. The first scan is always of an entire preparation. You are shown a preview of the scan to ensure that all margins are visible. If so, and you are satisfied with it, you then move on to other views of the preparation, and the adjacent teeth. The final scans are of the arches in occlusion.
 |
 |
|---|
|
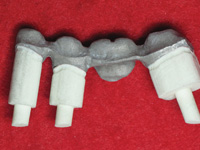
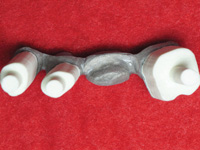
Figures 11 and 12. The removable dies. |
|---|
Upon successful completion of the scanning process, the file was wirelessly transmitted to iTero. They enhanced the image and verified the margins with the laboratory. A working model with trimmed, ditched removable dies (Figures 11 and 12) was delivered directly to our lab (the position of the margins and the ditching is done virtually on the computer). Our laboratory then fabricated the restorations in the usual manner and delivered them to our office.
Try-in and Delivery of the Final Restoration
 |
 |
|---|---|
|
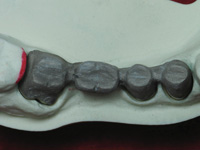
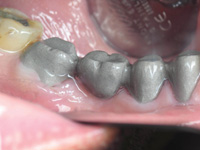
Figure 13. Metal try-in (on the model). |
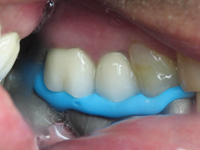
Figure 14. Metal try-in (intraoral). |
 |
 |
|
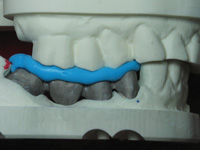
Figure 15. Verifying the occlusion clinically. |
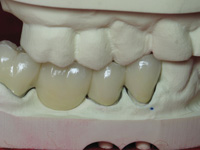
Figure 16. Verifying clinical occlusion on the model. |
 |
 |
|---|
|
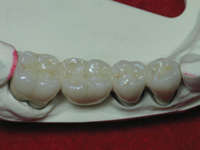
Figures 17 and 18. Completed restoration on the master cast. |
|---|
 |
 |
|---|
 |
|---|
|
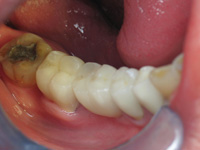
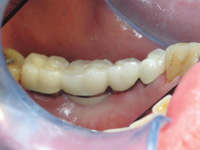
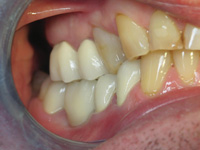
Figures 19 to 21. The unadjusted try-in of the fixed partial denture prior to cementation (occlusal view, lingual view, and buccal view).
|
|---|
Two weeks later, Warren returned for his metal try-in. After removing the provisional fixed partial denture and cleaning the preparations, the metal framework was tried in the mouth. Figures 13 and 14 show the initial metal try-in. No adjustments were made to get this framework to go into place. It was effortless! I verified the occlusion with bite registration material (Figures 15 and 16), and then sent the framework back to the dental laboratory along with the proper shade prescription. One week later, the final restoration was ready for cementation (MaxCem Elite [Kerr]) with only modest corrections needed (Figures 17 to 21).
CONCLUSION
Improvements to digital scanning systems have occurred over the years, and newly created digital systems have been introduced that enable the dentist to choose various methods of reproducing the intraoral situation in the extraoral environment. Cadent’s iTero system is just one of the latest advances in the art and science of dentistry. The precision of optical scanning enables the operator and the dental technician to provide superior restorations. With digital impression techniques, the number of operator and material variables is reduced and the restorative process becomes more predictable and easier to accomplish.
References
- Starcke EN. The histo
ry of articulators: a perspective on the early years, Part I. J Prosthodont. 1999;8:209-211. - Information provided by Cadent, Inc.
- For further explanation of the ISO 178 test, go to http://www.ides.com/property_descriptions/ISO178.asp. Accessed August 31, 2009.
- ISO is the International Organization for Standardization: www.iso.org.
Dr. Zweig received his DMD degree from Washington University School of Dental Medicine (St. Louis, Mo), and his certificate in Prosthodontics from the USC School of Dentistry. He has held faculty positions at both institutions. For the past 28 years, Dr. Zweig has been in private practice in Beverly Hills, Calif, concentrating on complicated restorative, cosmetic and implant restoration cases. Dr. Zweig can be reached via e-mail at drzweig@beverlyhillsdds.com.
Disclosure: Dr. Zweig reports no conflicts of interest.


