Mid root curvatures can be every bit as vexing as their apical counterparts, especially where the coronal third is relatively straight and the middle third abruptly curves. Negotiating such mid root curvatures safely and efficiently requires intention and forethought. Not adequately addressing the mid root curvature can easily and very quickly lead to file separation and other iatrogenic outcomes.
Strategies used to manage mid root curvature have application across a wide range of cases and outcomes. This article was written to allow the clinician to manage the middle third of the root safely and efficiently, especially in the presence of a mid root curvature that may or may not be present radiographically. Canals may appear to be straight from mesial to distal but can be significantly curved buccal to lingual. While this 3-dimensional curvature may not be easily seen on a radiograph, these curvatures can easily lead to iatrogenic potential if not managed correctly. Such iatrogenic outcomes can include, amongst others, blockage with debris, ledging, canal transportation, strip perforation, and file breakage.
 |
 |
|
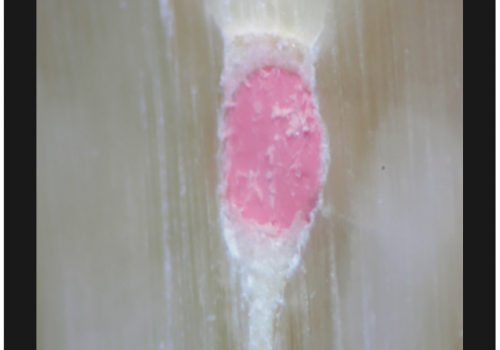
Figures 1 and 2. Challenging mid root curvatures treated in the manner described with K3 RNT and obturated with RealSeal (SybronEndo). |
STRATEGIES FOR MANAGING MID ROOT CURVATURES
Strategies for management of mid root curvatures begin in the preoperative evaluation. Evaluation of the expected mid root curvature should guide the clinician’s technique as to the strategy that will be used in instrumentation of the given mid root curvature. Excellent access and management of the coronal third are the first two steps toward managing the middle third. Said differently, achieving an excellent shape in the coronal third has significant application in creating a platform for ideal treatment of mid root curvature. An ideal coronal third preparation will allow greater volumes of irrigant to reach more deeply into the canal space more quickly, and allow the insertion of hand files into the middle third without the obstructive and restrictive dentin that would otherwise be present at this level of the canal. Removal of restrictive dentin is consistent with better tactile sense and a greater flexibility in use of the file, in that the file can be used with the greatest possible effectiveness at its tip because it is not being restricted along its length.
If a significant mid root curvature exists, the clinician will limit the insertion of orifice openers to the level of curvature, but not beyond. Advancing a rotary Ni-Ti (RNT) orifice opener into a significant mid root curvature can easily lead to tip fracture. Orifice openers are used primarily in the straightaway portions of canals and with great respect to the thinnest wall of the canal to avoid perforation. An orifice opener such as the K3 RNT shaper (SybronEndo)—the author’s preferred orifice opener (available in .12, .10, and .08 taper)—can be used with a brush stroke like a Gates Glidden drill along the various walls of the canal (taking care to avoid furcal strip perforation of the root). In other words, knowing the relative limitations of the shaper can prevent its fracture, especially in mid root curvatures.
Once the straightaway portion of the canal is instrumented above the mid root curvature, and the clinician is ready to instrument the mid root curvature, the first and foremost value is for the clinician to very carefully explore the mid root curvature with small hand files such as 6 to 15s. Such hand files are precurved in the apical 3 to 4 mm; such a bend is gentle and made without kinking, because acute bends reduce the effectiveness of the file as a negotiator and can increase the chance of fracture. A curved hand file is ideal for the greatest effectiveness in negotiation of the canal, and it gives the clinician the greatest chance to open up a canal that might otherwise resist a RNT file or larger hand file if that file were to be placed into the canal. Hand files come before rotary Ni-Ti (RNT) virtually always, unless the canal is significantly large initially and hand exploration is unnecessary. In practical terms, such hand negotiation is only redundant in wide canals that are sufficiently straight and open.
Hand negotiation is patient, slow, and gentle. Irrigation is copious and is accomplished after each insertion of the file, which is used until it will spin freely in the canal. In clinical practice, the 6 to 10s are used until they will each spin freely, and irrigation takes place after each file use. The No. 10 K-file can be thought of more as a patency file than as a file that enlarges the canal. After the canal is opened to at least a 15, a “glide path” can be considered to have been created. Only when the No. 15 hand K-file will spin freely in the canal should the RNT files be inserted.
A common area of misunderstanding is a knowledge of to what depth in the canal a glide path should be created and at what stage in the instrumentation process. The clinician should estimate the working length before initiating treatment of the tooth. Moving first from the coronal third to the middle third and finally the apical third, as the clinician gets closer to the estimated working length (EWL) he or she can take a total working length (TWL) measurement in one of several ways, such as via an electronic apex locator or radiographically, amongst other methods. The clinician must be conscious of the resistance felt tactilely with hand files as the apical foramen is approached. Most specialists do not take a TWL until late in the process of instrumentation because they are always aware tactilely of where they are in the canal. Finally, if one is using only small hand files (6 to 15s), while it is theoretically possible to ledge or transport a canal, in actual practice it is very uncommon and difficult to do.
For a dramatic mid root curvature, .02-tapered RNT files can be considered. Specifically, if the hand files have been used to bypass the mid root curvature and the glide path created, while there are many strategies for creation of the initial RNT use in the canal, the favored method of the author is to employ .02-tapered K3 files starting with the .02-tapered No. 15 file, which is taken as far apically in the most gentle, deliberate, and passive manner possible. If the file won’t advance easily, it is not forced. While the .02-tapered K3 is not fragile, it will not have the same resistance to torque-related failure that a .06-tapered file will have. Having had extensive experience with .02-ta-pered K3 files, it is the empirical opinion of the author that once the canal is instrumented to a No. 15 hand file, there is no reason (even in severe curvatures) why the tooth cannot be instrumented from this point forward with RNT. The caveat to this statement is that all of the correct tactile precautions, rotational speeds, torque settings, etc, must be employed. For the author, this involves running the files, including the .02- tapered files, at 900 rpm and with the torque control turned off. While this is not recommended for the novice clinician (a more prudent approach might be to use 350 rpm with the K3 and a more restrictive auto-reverse torque control setting), practice in extracted teeth can provide experience that allows increased speeds and less torque control. For the author, removing the limitations of torque control allows a greater tactile control over the file relative to having a file that is being held back by the use of torque control. The clinician, not the electric motor, should control the file.
The .02-tapered No. 15 K3 is used beyond the curvature and is followed by the No. 20 .02-tapered K3. Use of the K3s allows a hand-created glide path to be enhanced and refined into a far more predictable track for the subsequent RNT file to traverse down the canal. The clinician can use all larger RNT files with confidence once the .02-tapered size 15 and 20 K3s have optimized the glide path. It is actually challenging to then separate a file because the canal has been enlarged so predictably that a file that has been subjected to significant previous torque or flexural failure would have to be used in order to cause separation.
After the .02-tapered K3 15 and 20 files are used, the clinician has various options when choosing how to proceed down the canal. Depending on the canal curvature, while generally a crown-down approach is encouraged, this is one case where using a step-back approach has application. Specifically, the clinician can then take a .04-tapered 15, 20, and 25 to the desired length. Achievement of these file insertions is predicated on the assumption that the files will be easily inserted in the canal and will not be forced to an arbitrary length. After the .04-tapered 25 K3, the clinician can then insert a .06-tapered K3. In concept the clinician is enlarging the canal to a minimum diameter before attempting to more fully enlarge the canal (ie, the goal is to open the canal to a degree that it will more easily accept a larger taper and tip sized file used in a crown-down fashion). Each of the insertions mentioned above is performed after irrigating the canal and after recapitulating the canal with small hand files. It is critical that the canal be flushed of debris and the canal path remains clear and open throughout the process. After the above sequence, the clinician can use more standard crown-down methods. Specifically, a canal that has been taken to a .06 20 tip size or a .04 20 tip size can then usually be instrumented in a crown- down manner, usually .06 40, 35, 30, 25, and 20 files, with each file traversing the canal further apically and past the point of mid root curvature.
Alternatively, if the clinician chooses, the files can be used varying the taper in order to smooth the movement down the canal. For example, such a variable tapered sequence might include using .06-tapered K3 No. 40, followed by a .04 tapered K3 35, .06 tapered 30, .04 25, .06 20, and .04 15. Such a sequence allows the clinician to move down the canal with confidence, in that each subsequent file is moving further apically. Again, after each file insertion irrigation is copious and accompanied by recapitulation of the canal.
Instrumentation sequences might have to be repeated as often as needed to enlarge the canal to the appropriate diameter. Each successive movement of the sequence of files down the canal will allow the files to traverse down the canal more predictably, and as such deeper body shape will be created and the canal space more completely instrumented with narrowing cross-sectional diameters. In other words, the end of instrumentation can be approached more predictably with multiple sequences of the files. If a given file in the sequence will not advance as desired, the sequence can be started again, and with subsequent insertions each of the files will advance further apically to the desired level. Said differently, if the clinician would like to reach some minimal level of preparation that approximates a .06 taper 30 at the apical diameter, it may be necessary simply to repeat the sequence of insertions again and again, especially in the presence of significant mid root curvature.
CONCLUSION
To address challenging mid root curvatures, it is essential to remain patent, irrigate copiously, first negotiate canals by hand (generally before using RNT), and consider using RNT files in a step-back manner as described to attain a minimal diameter before final shaping (Figures 1 and 2).
Dr. Mounce lectures globally and is widely published. He is in private practice in endodontics in Vancouver, Wash. Among other appointments he is the endodontic consultant for the Belau National Hospital Dental Clinic in the Republic of Palau, Koror, Palau (Micronesia). He can be reached at lineker@aol.com.


