Many clinicians shy away from placing direct composite veneers because they feel resin composite is an inferior material to porcelain. Furthermore, the placement of direct composite resin veneers can be time consuming. Attaining the right shade, tooth form, and a high surface polish/luster in a predictable manner has vexed the profession since the introduction of composite resin materials. Composite resin technology has made tremendous strides, and the improvements made in these materials are now to the point where they can offer the same durability as porcelain when done correctly. Recently introduced nanohybrid composite materials (such as Mosaic [Ultradent Products], Filtek Supreme [3M], and others) offer higher strengths and improved polishing. It is equally important to use a quality bonding agent to ensure a lasting bond; this can be said of porcelain or composite bonding.
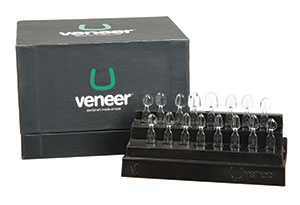
Porcelain veneers often require a reduction of tooth structure, whereas aesthetically improving a smile with composite resin can be much more conservative since tooth preparation is often not required. Composite resin restorations can be beautiful, conservative, and durable, and, when done in a timely manner, these restorations can also be highly profitable. When the cost of the material is compared to the net income earned for each restoration, the return on investment is impressive. Being able to accomplish them in a time-efficient manner seems to be the hiccup that is thwarting the popularity of direct placed restorations in the aesthetic zone. However, with the recent introduction of a template system (Uveneer [Ultradent Products]) for direct composite resin veneers, the clinician can more easily and predictably shape, contour, and polish these restorations (Figure 1).
The Uveneer template system offers large and medium sizes for upper and lower arches (from first premolar to first premolar) in each kit. The templates have a mark in the center that coincides with the handle to help with proper alignment. After using a template, it can be wiped with an alcohol gauze, autoclaved, and then placed back in the kit for the next patient needing this treatment option.
CASE REPORT
Diagnosis and Treatment Planning
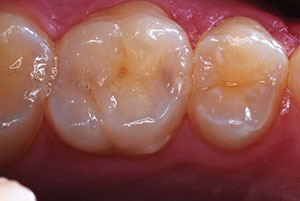
A 34-year-old female presented with an upper left central incisor (tooth No. 9) that was darker than the adjacent teeth (Figure 2). A radiograph indicated there was no pulpal pathology. Although tooth No. 9 was her chief complaint, the slight mesial lingual rotation of tooth No. 8 was also discussed, as well as the irregular incisal edges of teeth Nos. 7 and 10. After discussing the treatment options, the patient was comfortable with veneering all 4 teeth using composite resin. The only tooth that needed to be reduced was No. 9, in order to mask the discoloration with composite resin.
 |
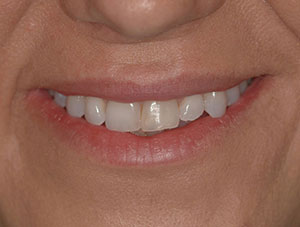 |
| Figure 1. The Uveneer Template System (Ultradent Products]). | Figure 2. The preoperative smile. |
 |
 |
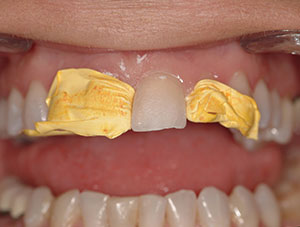
| Figure 3. The discolored right central incisor (tooth No. 9), ready for bonding, had been reduced and isolated using Teflon tape and cheek retractors (KleerView [Ultradent Products]). |
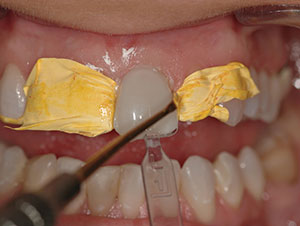
Figure 4. Excess composite was removed from the periphery of the Uveneer prior to curing. |
 |
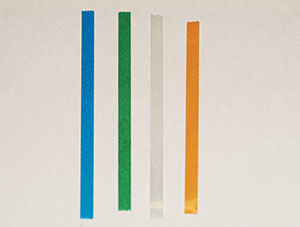 |
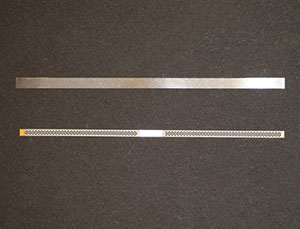
| Figure 5. A serrated strip and an ultrafine metal strip (VISIONFLEX UF [Brasseler USA]) were used. | Figure 6. EPITEX (GC America) polishing strips were used. |
Clinical Protocol
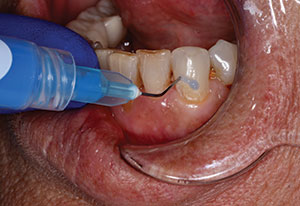
The teeth were cleaned with pumice prior to the adhesive bonding steps. The reduction of tooth No. 9 was accomplished using a diamond bur (Brasseler 012506U0 [Brasseler USA]). To help isolate the area and to make the work proceed more efficiently, cheek retractors (KleerView [Ultradent Products]) were inserted to keep the lips and cheeks away from the operative area. Teeth Nos. 8 and 10 were wrapped with Teflon tape (Figure 3). The author prefers Teflon tape over other matrices because it intimately adapts to the tooth and is thin enough that it does not interfere with the establishment of proximal contacts, no wedges required.
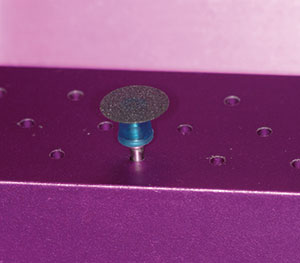
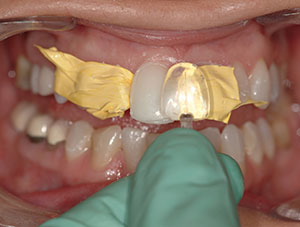
The upper left central incisor was etched for 15 seconds (Ultra-Etch [Ultradent Products]), then thoroughly rinsed, and excess moisture was removed. The total-etch technique is preferred over the self-etch option when bonding to enamel. A universal adhesive (Peak Universal Bond [Ultradent Products]) was applied, air-thinned, and then cured using Velo LED Curing Light (Ultradent Products) for 10 seconds. Next, a nanohybrid composite (Shade B 0.5, Mosaic [Ultradent Products]) was placed on the tooth from a unidose compule, investing very little time in providing a rudimentary shape. The large-sized veneer template was then pressed into the uncured composite. As the template was pressed into the uncured composite, excess composite extruded from the periphery of the template, indicating that the template was in full contact with the composite. While stabilizing the template by holding onto the handle, the excess composite was removed with an instrument (Figure 4). The firm viscosity of the nanohybrid composite made removal of the excess much easier than if a creamy composite with lower viscosity had been used. The composite resin was then light-cured through the template for 10 seconds. The template was then removed from the cured composite. Next, a serrated strip (Jiffy Proximal Saw [Ultradent Products]) was used to ensure a clean contact, followed by an ultrafine metal strip (VISIONFLEX UF [Brasseler USA]) to smooth any tags of resin or bonding agent that may have still been adhering to the proximal wall (Figure 5). (Note: Using a strip more aggressive than ultra-fine may open the contact.) The final polish of the proximal walls was achieved using EPITEX (GC America) polishing strips; these are fine polishing strips that shine the proximal surface without opening the contact (Figure 6). The incisal edge of the veneer was adjusted using polishing discs (EP Esthetic Polishing System [Brasseler USA]) (Figure 7). The facial surface did not need to be adjusted or polished since the template left a beautiful glossy surface to the veneer.
 |
 |
| Figure 7. A polishing disc (EP Esthetic Polishing System [Brasseler USA]) was used. |
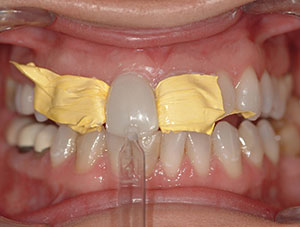
Figure 8. The large-size Uveneer template was placed on the uncured composite. |
 |
 |
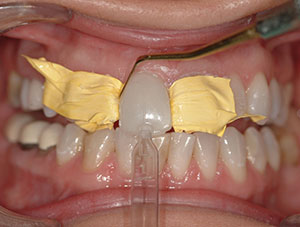
| Figure 9. Excess composite was cleaned from the periphery of the template. | Figure 10. The template was removed from tooth No. 8. (Note the faint outline of the veneer in the cured composite.) |
 |
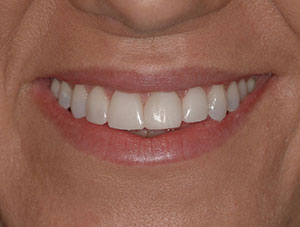 |
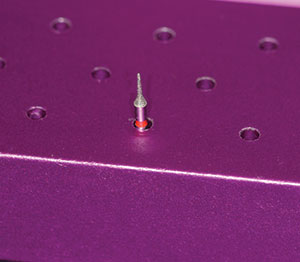
| Figure 11. A mosquito diamond bur (004969U0 [Brasseler USA]) was used. | Figure 12. The postoperative smile of the completed direct composite resin veneers on teeth Nos. 7 to 10 (Mosaic [Ultradent Products]). |
After completing the left central incisor, the upper right central incisor was addressed. No reduction of tooth No. 8 was necessary. The cheek retractors remained in place until all bonding was completed. Tooth No. 8 was acid-etched and rinsed following the same protocol as for tooth No. 9. Excess moisture was removed. The universal adhesive was then applied to tooth No. 8, and it was then air-thinned and light-cured. The Mosaic nanohybrid composite was applied to the tooth and quickly given a rudimentary shape. The large-sized template was placed on the uncured composite (Figure 8). The excess composite was cleaned from the periphery of the template (Figure 9). Once the composite was cured through the template, the template was removed using its handle (Figure 10). There was a slight outline of the template in the cured composite that was removed using a fine diamond mosquito bur (Jiffy Interproximal Diamond #4248, [Ultradent Products, Inc.] or Brasseler bur 004969U0 [Brasseler USA]) after removal of the Teflon tape (Figure 11). The mesial lingual rotation of tooth No. 8 was successfully camouflaged by using the large-veneer template to give it ideal shape and contour. The same finishing/polishing protocol as described for tooth No. 9 was then carried out. After tooth No. 8 was completed, the right and left laterals were addressed (Figure 12).
CLOSING COMMENTS
Historically, clinicians have hesitated to use composite resins for anterior aesthetics due to the materials’ poor optical properties, lack of shine, poor handling, and questionable longevity. The introduction of nanohybrid composite resins have helped to overcome many of the challenges once faced by clinicians and have brought with them a predictability and ease of placement that instills confidence in the practitioners who choose this material option. Knowing lifelike results can be achieved, along with strong and long-lasting results, conservative dentistry is now possible in many cases without the fears of the past.
Another important reason that has historically existed for not providing resin veneers has also been resolved. The profitability of composite veneers can only be realized if they can be done in a time-efficient manner. With the introduction of a veneer template system that allows a placement protocol with greater predictability and ease of application, the use of direct composite resin veneers is expected to increase in popularity among clinicians and patients.
Dr. Morgan graduated from the University of Texas Health Science Center at San Antonio. While beginning her practice in San Antonio, she was a founding officer in the South Texas Chapter of the American Academy of Cosmetic Dentistry. She relocated to Salt Lake City and helped develop seminars that included workshop/hands-on components for Ultradent Products, Inc. She has lectured worldwide on cosmetic dentistry. She is also a co-founder of The American Academy of Esthetic Orthodontics. She maintains Morgan and Presley Dental in Midvale, Utah, while continuing to teach resin bonding, tooth whitening, and orthodontic therapy under the name of Prestige Seminars. She can be reached at (801) 561-9999 or via email at morganjaimee@hotmail.com.
Disclosure: Dr. Morgan is a consultant for Ultradent Products, Inc.
Related Articles
Why GPs Should Pursue Orthodontic Training
Follow the Cosmetic Pyramid for Optimal Aesthetic Results
Simple Lab-Fabricated Aligner System


