


We received a phone call from a panic-stricken mother who reported her 13-year-old son had fallen at school and broken his two upper front teeth. We advised her to bring her son in immediately for emergency diagnosis and treatment. Shortly after, the boy arrived accompanied by both his parents. He complained of pain from both of his broken teeth.
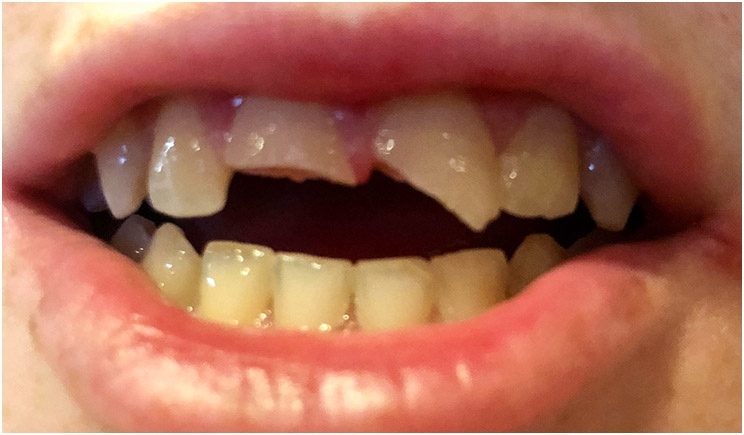
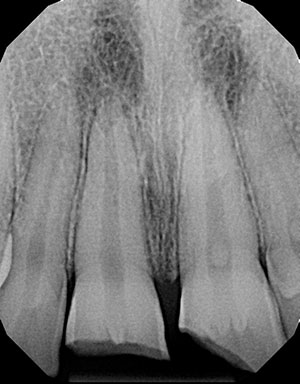
Clinical and radiographic findings revealed enamel-dentin fractures with pulpal exposures of both maxillary central incisors (Figures 1-2). Tooth No. 8 suffered a horizontal enamel-dental fracture severing the crown at the top of the pulp chamber. Tooth No. 9 presented with an oblique enamel-dental fracture exposing the mesial aspect of the pulp horns. There were no signs or symptoms of alveolar bone fracture. A diagnosis of complicated crown fractures was determined for both Teeth Nos. 8 and 9.
 |
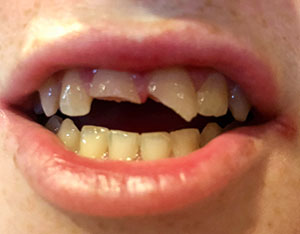 |
| Figure 1: The periapical radiograph demonstrated clinical crown fracture-complicated of teeth Nos. 8 and 9. | Figure 2: A photograph of the initial presentation taken by the patient’s mother prior to arrival. |
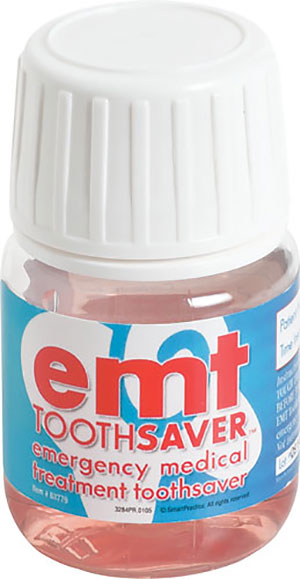
Fortunately, the patient’s mother exercised both good judgment and prompt action. She had her son return to the scene of the fall and instructed him to find and collect the broken tooth fragments. He was able to locate two fragments, and they were placed in a jar of EMT ToothSaver Solution by Allerderm Labs provided by the school. EMT ToothSaver Solution is a storage medium for teeth or tooth fragments until replantation by the dentist. It is pH balanced and biocompatible, and it can help prevent dehydration (Figure 3).
The Treatment Begins
To alleviate the patient’s discomfort, we immediately administered Septodont Septocaine local anesthetic via the Wand from Milestone Scientific to locally infiltrate the maxillary anterior. Once anesthetized, the two severed tooth fragments were carefully examined, oriented, and approximated relative to the remaining fractured teeth. Remarkably, the two fragments were intact and fit the fractured teeth well.
 |
|
Figure 3: A jar of EMT ToothSaver Solution contained the fragments. |
Isolation was achieved via the placement of an optragate by Ivoclar Vivadent and a child sized mouth prop. Hemostasis of both pulpal exposures was achieved. Direct pulp capping of both teeth Nos. 8 and 9 was completed with the application of Vitrebond resin-modified glass ionomer from 3M ESPE. The fractured segments and the remaining crowns were etched with 35% phosphoric acid gel for 20 seconds.
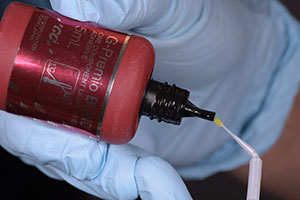
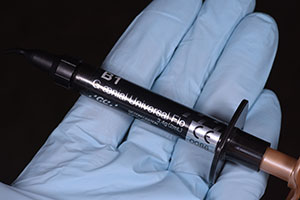
G-Premio Bond universal bonding agent from GC America was applied to both of the tooth fragments and the fractured remaining crowns and air-thinned (Figure 4). We then used GC America’s GC Universal Flo universal flowable composite resin to lute and bond the fractured tooth segments to the fractured crowns (Figure 5). Both teeth were light cured from both facial and palatal aspects using the Ivoclar Vivadent Bluephase curing light for 40 seconds each.
The margins of the bonded segments for both teeth Nos. 8 and 9 were then polished using a high-speed handpiece, fine-grit diamond, flame-shaped bur. The occlusion was checked in both centric and protrusive movements and adjusted. Further finishing and polishing were achieved using coarse, medium, and fine grit Super-snap composite polishing disks from Shofu. We then applied Diashine Intra Oral intraoral polishing paste to achieve a high gloss.
Once complete, we gave a handheld mirror to the patient and asked him, “Does this guy look familiar?” The boy immediately looked in the mirror, and his face lit up with a big smile. His parents also began smiling. Everyone breathed a sigh of emotional relief.
Post-Treatment Procedures
We advised the parents that although we restored normal aesthetics, one or both teeth may need root canal therapy should pain persist or necrosis develop. As such, the patient was referred to and appointed for follow-up with the endodontist. The patient was also advised to remain on a soft mechanical diet and avoid biting hard foods with the repaired centrals.
After the urgent care was completed, a plan was developed to address potential future treatment needs and complications. There is a high risk of debonding of the repaired tooth fragments during potential endodontic access preparation. There is also a risk of one or both fragments failing during the teen’s normal activities.
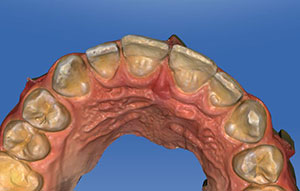
For future reference, we took a digital optical impression of the patient’s maxillary arch using the CEREC omnicam (Figures 6-9). A permanent digital record of the shape, size, and morphology of the child’s natural teeth was easily created without putting him through a messy and uncomfortable impression that could add unwanted stress on the newly repaired teeth.
 |
 |
| Figure 4: G-Premio Bond universal bonding agent was applied using a microbrush. |
Figure 5: GC America’s Universal Flo Universal flowable resin composite was used to lute the fractured tooth segments |
 |
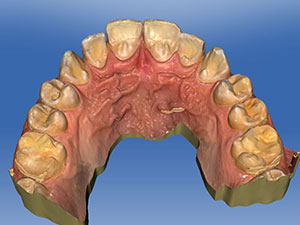 |
| Figure 6: We took occlusal views of the digital impression using a CEREC Omnicam of the repaired maxillary central incisors. | Figure 7: Another occlusal view of the digital impression. |
 |
 |
|
Figure 8: A third occlusal view of the digital impression. |
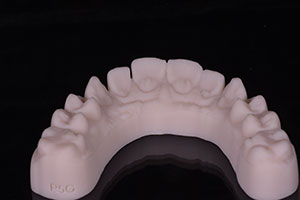
Figures 9: Palatal view of the 3-D printed model created from the CEREC Omnicam digital impression. |
The scan was then used to print a 3-D model of the patient’s maxillary arch (Figures 10-11). In the event one or both fragments chip, debond, or are lost, both the digital optical impression and the 3-D printed model could be used in several different ways to copy and restore the natural aesthetics, form, and function of the patient’s natural teeth.
 |
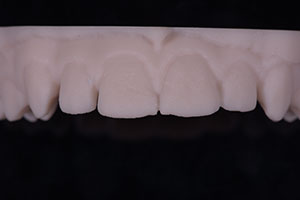 |
| Figures 10: Occlusal facial view of the 3-D printed model created from the CEREC Omnicam digital impression. | Figure 11: Facial view of the 3-D printed model created from the CEREC Omnicam digital impression. |
For example, the 3-D printed model could be used create a putty index for direct composite restorations. Alternatively, the digital optical scan could be used to copy the shape of his natural teeth and mill ceramic fragments to repair if needed. Having a plan in place alleviates stress for managing future treatment complications for both the dentist and patient alike.
The Follow-Up
Since the initial visit, the endodontist has seen the patient for a follow-up visit. The endodontist reported that both teeth exhibited normal thermal testing, and the patient is comfortable. Also, the endodontist will see the patient for another re-evaluation in a few more weeks. Only time will tell, but regardless we are prepared!
Dr. Halpern graduated with a dual degree from the University of Pennsylvania in 2002, earning both a DMD and a master’s degree in higher education. She then completed a general practice residency in 2003 at New York Presbyterian/Cornell Weill Medical Center in New York. As a general dentist, Dr. Halpern maintains a private practice in Port Jefferson Station, NY. She has lectured on the topic of fixed prosthetics, ceramic materials, and dental photography. Dr. Halpern can be reached at (631) 928-1300, portjeffsmiles@gmail.com, or portjeffersonsmiles.com.
Disclosure: Dr. Halpern is a paid consultant for GC America and receives compensation for lectures and articles.
Related Articles
Recreating Nature: Righting the Wrongs of Iatrogenic Dentistry
Adherence to Guidelines After Dental Trauma Ensures Positive Outcomes
Physiotherapy Prevents Permanent Damage in Pediatric Trauma Cases


