INTRODUCTION
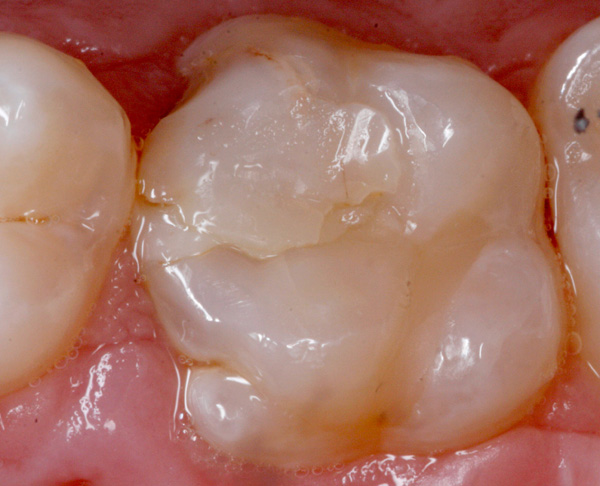
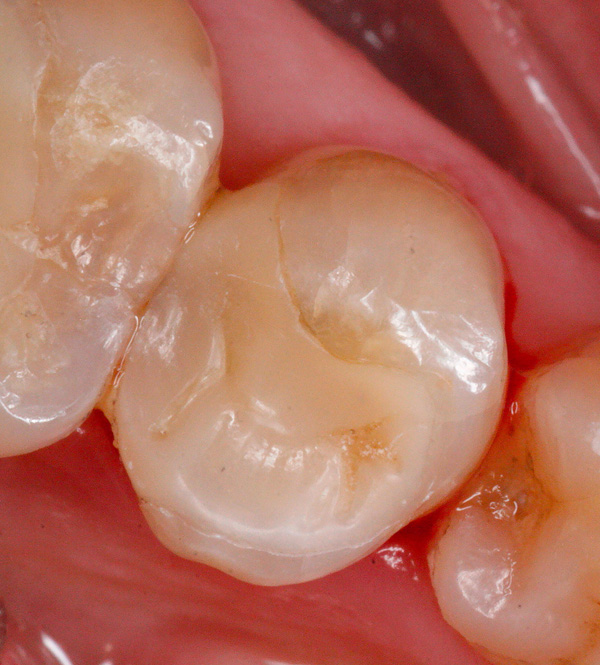
According to Dr. Gordon Christensen, direct Class II composite restorations with B-L widths larger than 25% of the intercuspal distance will last, on average, approximately 6 years worldwide. Based upon my clinical observations, the average is much less than that (Figure 1). For more than 30 years, the profession has attempted to improve on that average by designing many different matrices, composites, hand instruments, bonding agents, liners, wedges, isolation devices, curing lights, etc. Although I realize that there are A+ clinicians who produce quality direct resin Class IIs, it is very clear that these direct placement composite restorations that are larger than the 25% limit are still a significant problem for the profession.
As I see it, there are 2 reasons for this performance. First, despite design improvements over the years, curing lights cannot provide 100% chemical conversion of the resin matrix material. (At best, I believe it is in the 70% to 80% range.) Second, the direct resin Class II restoration is compromised by the presence of voids (Figure 2). The effect of these issues was clearly demonstrated during the development of glass fiber/epoxy resin matrix composites for industrial applications. The presence of voids within the material served as failure loci with applied forces and increased the solubility of the resin matrix. In order to eliminate the voids, and thereby maximizing the mechanical properties of the fiberglass, the material needed to be cured in an oxygen-free atmosphere under pressure or in a vacuum coupled with the application of heat. This resulted in near 100% chemical conversion of the resin matrix.
Additionally, the glass fibers were treated with silane in order to improve the bond between the glass and the resin matrix. Several dental manufacturers had developed equipment to cure dental composite according to this industrial blueprint. Unfortunately, however, the response within the profession was tepid at best.
 |
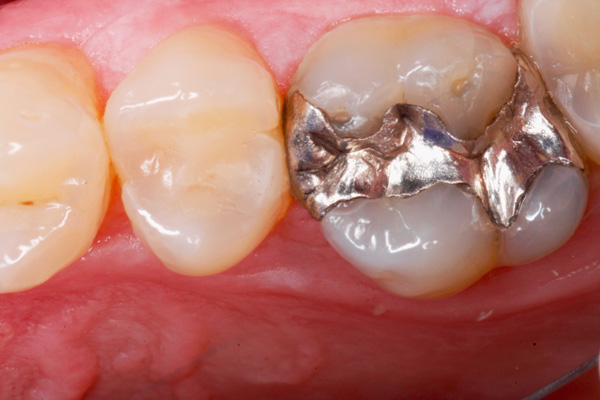 |
| Figure 1 Clinical example of a Class II direct composite resin that was placed approximately 1 year prior. | Figure 2 Clinical appearance of a Class II direct resin restoration placed approximately 8 years previously. Note the presence of voids. |
 |
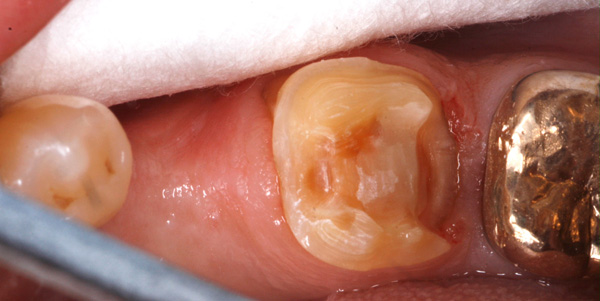 |
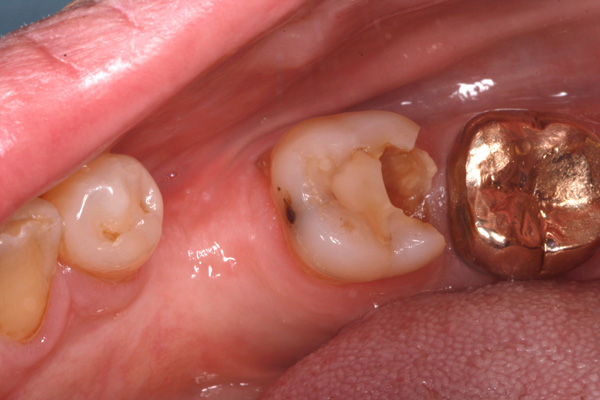
| Figure 3 Failing direct composite restoration on tooth No. 19. | Figure 4 Onlay preparation for an indirect composite restoration. |
My answer to these advancements was aggressive, as my initial attempts to restore with direct resin were complete failures. I decided on the spot to either utilize something different or restore posterior Class IIs with amalgam only. Since that time, any restoration larger than that 25% measurement, in my hands, was completed indirectly. I have not looked back. I currently perform nearly all of my fixed restorative cases (including bridgework and implant restorations) in-office, in one visit, by my hand, in approximately 2.5 hours. I inform my patients that I expect approximately 10 years of useful life from these restorations. This is very similar to the guarantee given by 3M, the maker of Lava Ultimate, which is essentially similar to the same product that I produce. I have found that as a result of some preparation modifications shown in this article, I have been able to create full crowns with my material. Interestingly, there has been a push toward the use of indirect composite restorations manufactured digitally for implant applications due to the stress-dissipation properties of the material and because resin is more gentle to the cutting instruments utilized in the milling machine. I will outline the specifics of the technique I currently employ in the following example.
CASE REPORT
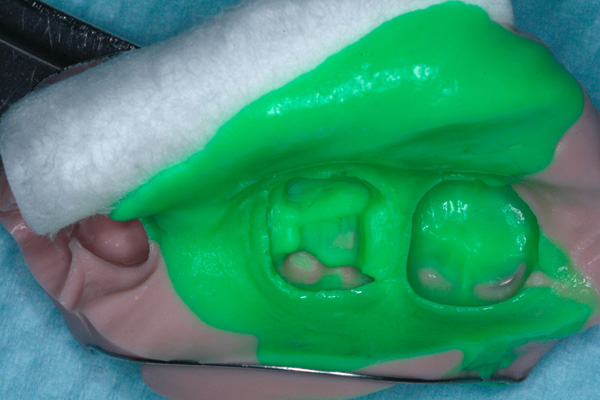
The patient presented with a failing composite restoration involving tooth No. 19 (Figure 3). The preparation was basically an onlay with the preservation of as much circumferential enamel as possible. Occlusal reduction is often limited to the middle third or less, attempting to keep the final margin supragingival (Figure 4). Full-crown restorations are possible but performed only if I have no choice. Single-unit impressions are taken with a small, metal, perforated quad tray utilizing both irreversible and reversible hydrocolloid material (Figure 5). The working model was made from a combination of Mach-2 Die Silicone (Parkell) and Blu-Mousse (Parkell) for the base. The model was ready for use in approximately 5 minutes (Figure 6). A rubber die spacer (TAUB Products) was placed prior to restoration construction.
 |
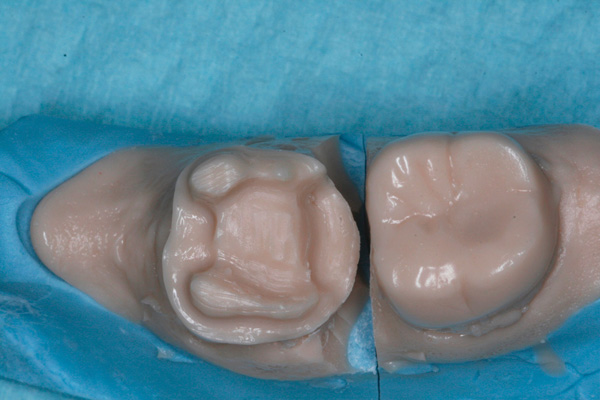 |
| Figure 5 Single-unit final impression. A reversible hydrocolloid (Cohere [Gingi Pak]) was syringed around the preparation with alginate supplying the base. | Figure 6 Completed die for a single-unit restoration. |
 |
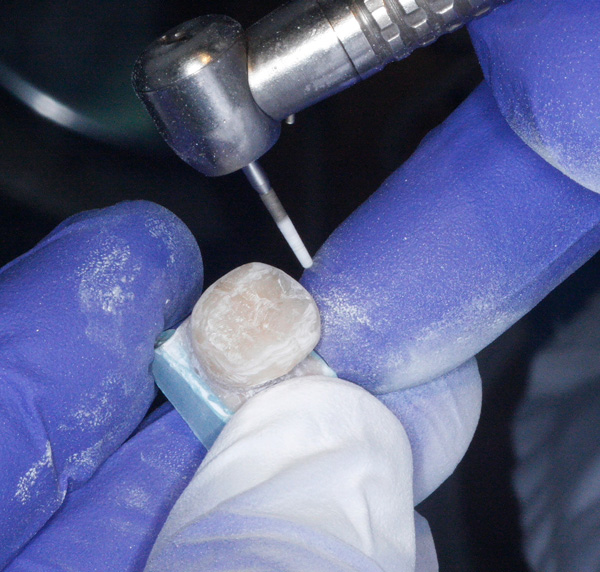 |
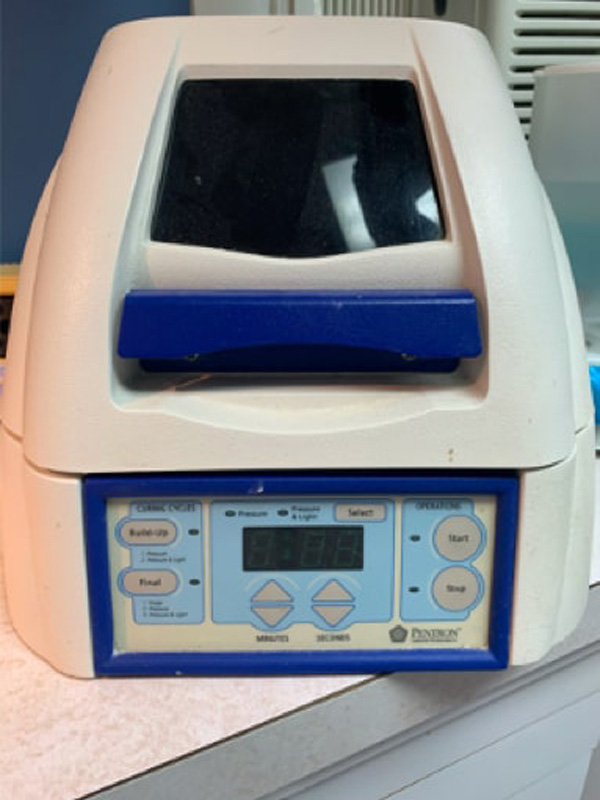
| Figure 7 Sculpture FibreKor Curing unit (Jeneric/Pentron). | Figure 8a A contour restoration as one would do for an ordinary temporary. |
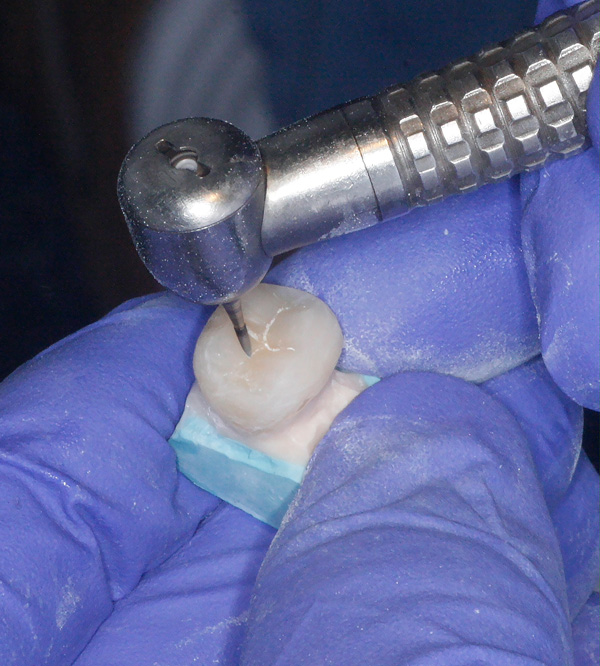
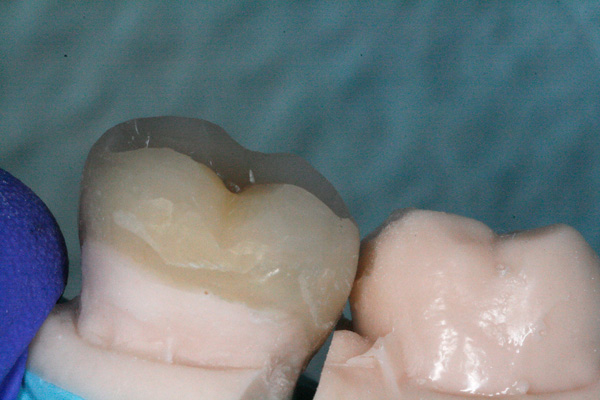
I began the construction of the restoration with a resin nano-ceramic composite material from Cosmedent. The material is easy to work with, and shading follows the VITA shade guide. However, any resin nano-ceramic can be used. In most cases, the restoration is built using between 3 and 4 layers and cured in the unit (Sculpture FibreKor Curing Unit [Jeneric/Pentron]) (Figure 7) between the addition of each layer. Each layer gradually builds to a complete outline form of the tooth. Usually, opposing models are unnecessary if one follows the marginal ridge height of the adjacent tooth. Occlusal tables are shaped with common diamonds and carbides. Occlusal reductions and additions are quick and easy. Ideal interproximal contacts are always obtained. Multiple shades can produce superior aesthetics, but one can use a mono-shade (Figure 8).
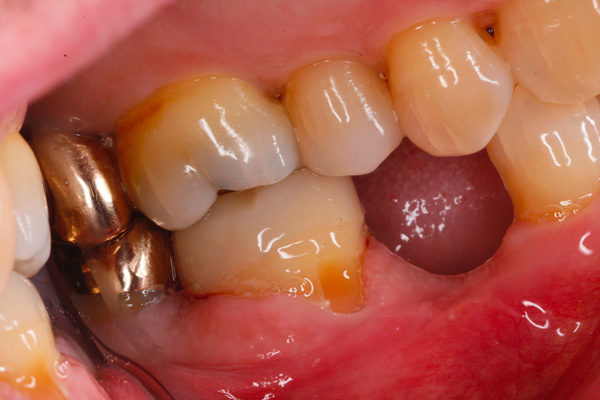
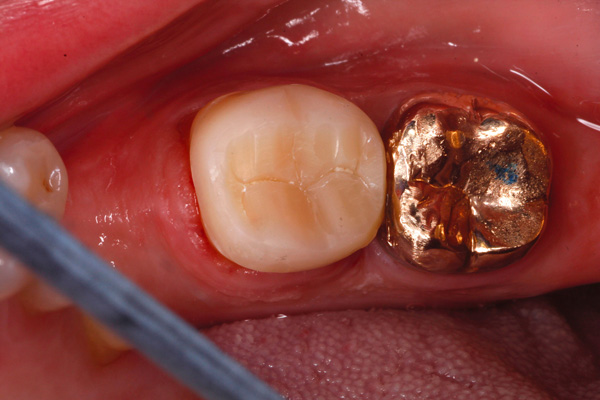
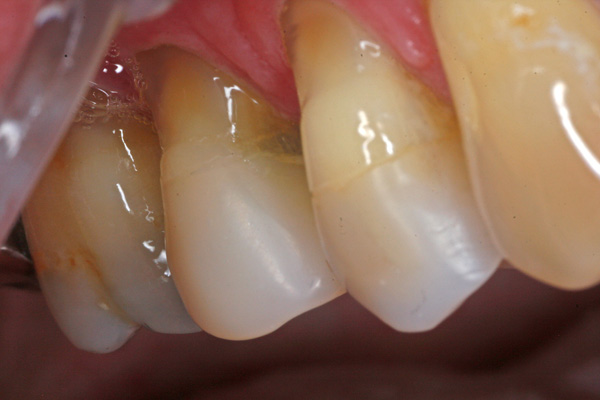
The cementation process involves the use of the bonding agent Peak (Ultradent Products). The resin cement was Vit-l-essence micro-hybrid composite (Ultradent Products), warmed to 155°F using a composite warming device (Calset Warmer [AdDent]) (Figure 9). However, any micro-hybrid or heating device or bonding agent will suffice. A standard composite cement shows cavitation of the gingival margin after only 1 to 2 years of service (Figure 10a), while the warmed composite as a cement looks fine after 3 years (Figure 10b).
 |
 |
| Figure 8b | Figure 8c |
 |
 |
| Figure 9a | Figure 9b |
 |
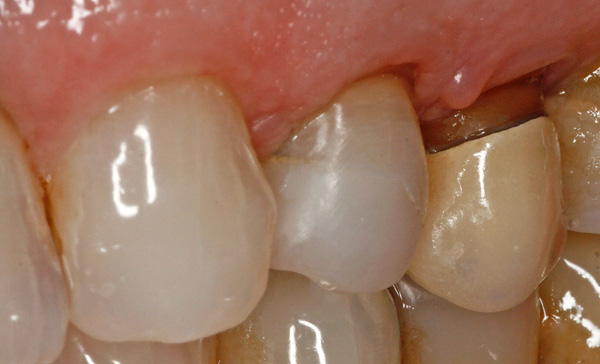 |
| Figure 10 (a) Appearance of an indirect resin composite restoration on Tooth No. 5 after 1 to 2 years of service. Note cavitation at the buccal margin. | Figure 10 (b) Indirect resin restoration appearance on Tooth No. 12 after 3 years. Note the smooth buccal margin. |
 |
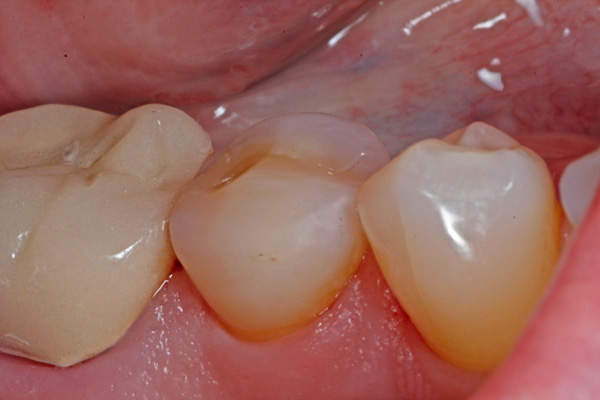 |
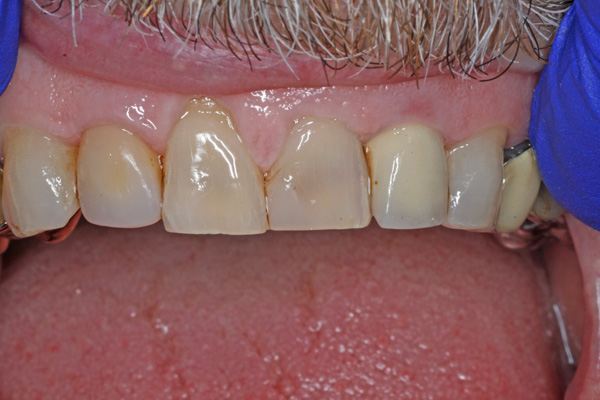
| Figure 11 (a) A No. 7 crown placed in 2007. | Figure 11 (b) A No. 29 crown placed in 2009. |
 |
|
| Figure (c) A No. 29 inlay placed in 2007. |
DISCUSSION
As I reflect back over the last 20 years utilizing this process, there are several conclusions to be realized. The technique I described herein has exhibited long-term clinical success. A favorite saying of Dr. Christensen accompanying every copy of his newsletter is, “Clinical success is the final test.” Clinical success over time is the only sure way to demonstrate the viability of a particular restorative method (Figure 11).
This restorative method also allows for more conservative preparations. Leaving finish lines in enamel leads to the best composite bond strength possible in the most critical area of a restoration. In addition, less aggressive preparation into gingival areas has led to fewer endo-
dontic referrals from my practice.
As the average age of the population continues to get higher, it is very clear that more complex, inexpensive, and durable restorations are needed. However, the risk of restoration failure also increases due to utilizing 70-year-old teeth as a foundation as opposed to 35-year-old teeth. This method allows for complex restorations at a very limited cost so as to provide a financial safety net in the event of the unexpected.
This indirect restorative method can provide a solution for a serious problem that has vexed the dental profession for many years: I am referring to the care of the underserved. Due to its minimal setup requirements and low cost per unit, one can provide service to hard-to-reach populations and still provide versatile restorative solutions, such as serving as an RPD retainer or allowing for repairs in high-caries situations. More teeth can be saved, along with the positive self-image of the patient.
CONCLUSION
I have often wondered why the response of the profession to this technique has been so poor. As I have alluded to earlier, the science behind this technique is nothing new. It has been proven through several decades of research. The durability of large direct placement composite restorations continues to be unsatisfactory. I have come to the conclusion that they were introduced in the wrong era. We are in the advanced digital age. It is the technology that sells to both practitioners and the public. The industry continues to develop new and better tech solutions to problems faced by the dental profession. That is a fact one cannot deny nor ignore. However, this author advises that we should all keep our eyes open and remember the old, proven ways because you never know when you might have to switch back to manual.
ABOUT THE AUTHOR
Dr. Telich graduated from Case Western Reserve University (CWRU) School of Dentistry in 1986. Additionally, he also holds MS and PhD degrees in Metallurgy and Materials Science from CWRU. His research experience involved the study of mechanical properties of graphite-epoxy composites. For several years, Dr. Telich had volunteered as both a preclinical and clinical instructor at CWRU. He can be reached at mtelich@att.net.
Disclosure: Dr. Telich reports no disclosures.
RELATED ARTICLES
No Support? An Easy Bite Technique
Optimizing Occlusal Results for Crown and Bridge Prostheses
Creating Precision Restorations Using a Hand-Dispensed Polyether


