 |
| Figure 1. The early work of Dr. Walter Hess showed the presence of MB1 and MB2 canals and the communications between them (blue arrows). |
INTRODUCTION
One of the most infamous canals we chase in endodontics is the second mesio-buccal (MB2) canal in maxillary molars. It’s often referred to as the “fourth canal,” and it is one of the most frustrating aspects of maxillary molar root canals.
We have known of the presence of the MB2 canal for more than a century. In 1917, Professor Walter Hess injected root canals of human teeth with vulcanized rubber and then removed the hard tooth tissues by decalcification. By doing so, he clearly showed the presence of the MB2 canals in maxillary molars1,2 (Figure 1). Perhaps due to the difficulty in finding these canals clinically, or the lack of proper tools needed to look for them, many dentists have performed root canals without treating the MB2.
This article will explain why the MB2 canal is important, where it is located, and how to treat it.
Why the MB2 Canal is Important to Treat
One often hears colleagues state that treating the MB2 canal is not very important. They may argue that their root canal treatments have been successful, even without treating MB2 canals. That may be the case empirically; however, we certainly know better. Leaving a canal untreated has its consequences, and let’s not forget the obvious: Root canal treatment is considered incomplete until all, not some, of the tooth’s canals are treated.3 To put it differently, please ask yourself the following question: If the patient was you or one of your family members, would you be satisfied with partially completed root canal treatment?
In vital cases (ie, irreversible pulpitis), incomplete root canal treatment may translate into ongoing pain (for example, a too-cold/hot sensation in the tooth following root canal treatment). In necrotic teeth (with infected canals), leaving an MB2 untreated may be even more significant. That’s because leaving bacteria in the MB2 canal simply increases the chance of endodontic failure and apical pathology.4 A case in point is seen in Figures 2 and 3.
Furthermore, some may argue that the MB2 orifice is sealed from any bacteria in the pulp chamber because it is often covered by a solid layer of dentin (the dentin shelf). This may be one of the reasons why many do not worry about an untreated MB2. However, as we’ve known from Dr. Hess’s work from a century ago, there are communications between the MB1 and MB2 canals in the form of isthmuses or anastomoses.1,5 (Figure 1 highlights the communications between the MB1 and MB2). So if the MB1 canal has bacteria in it, then expect the MB2 to also have bacteria in it.
 |
 |
| Figures 2 and 3. Note the apical lesion (red arrows) over and around an untreated MB2 canal in tooth No. 14. |
 |
 |
| Figures 4 and 5. Separate MB1 and MB2 canals (Figure 4) and converging MB1 and MB2 canals (Figure 5). |
 |
 |
| Figures 6 and 7. A red “X” marks the site of the tooth furcation. Grooving the floor over the furcation risks perforating the tooth, and it is also not the site of the MB2 canal. The blue arrow in Figure 6 shows how the MB2 is palatal to the MB1. The red arrows in Figures 6 and 7 show the incorrect direction to groove the floor. |
Nowadays, with CBCT imaging, it is easier to identify endodontic failures due to untreated MB2 canals. In Figures 2 and 3, an MB lesion is seen centered around the apical exit point of an untreated MB2 canal. Such cases could and should be treated by means of nonsurgical root canal retreatment, or apicoectomy, and with the use of a dental microscope.
Hence, an untreated MB2 canal is a main reason for endodontic failures in maxillary molars.3,4 So, hopefully everyone will take note of how important treating the MB2 canal is. Also, one should consider referring to an endodontist if the MB2 canal cannot be located or treated. There’s nothing wrong with performing a pulpectomy to manage the patient’s symptoms and referring to a specialist if—and when— needed.
Frequency of MB2 Canals
How often is the MB2 present? Well, the best answer is it’s always there, unless it was looked for at the right location, with the right tools and technique, and couldn’t be found. In other words, almost always. More specifically, studies put the numbers at around 90% to 95% for maxillary first molars and about 90% for maxillary second molars.2,6 Clinically, what seems to matter is how one goes about looking for the MB2. Take, for instance, the use of magnification. One study found that, using dental loupes and a dental microscope, the MB2 canal was located in 41% and 94% of cases, respectively.6 With no magnification, the frequency of finding the MB2 canal may drop to as low as 17%.7
It should also be mentioned that the MB1 and MB2 canals may run separate from each other or converge prior to reaching the apex2 (Figures 4 and 5).
Location of the MB2
The MB2 canal is located palatal to the MB1 canal. One needs to be well aware that it is not in the direction of the palatal canal, but toward the palatal aspect of the tooth. This is key. For the most part (with some exceptions), the MB2 orifice is about 1.0 mm to 3.0 mm from the MB1 orifice. In maxillary second molars, the MB2 tends to be closer to the MB1 than in first molars. In fact, by the time the 2 MB canals are fully instrumented, they may form a figure 8 or an ovoid orifice configuration.
 |
 |
| Figure 8. Instruments for grooving/unroofing the MB2 canal: a slow-speed handpiece (left) with a Mueller bur, surgical length round bur (top left). An endo ultrasonic with blunt tip (right). | Figure 9. Note how the handpiece head limits the visibility into the pulp chamber and of the bur tip. |
 |
| Figure 10. An unobstructed view of the pulp floor and ultrasonic tip. |
In middle-aged or older patients, the MB2 is typically located under a layer of dentin that sits on the pulp floor. This layer is called the “dentin shelf.”2 As such, if a dentin shelf is present, it needs to be removed in order to uncover the MB2 orifice. Otherwise, one will not be able to access the MB2 canal, no matter how diligently they look inside the pulp chamber (see Cases 1 and 2).
Treating the MB2
First, know where to look for the MB2 canal. Second, if the orifice is covered by the dentin shelf, remove it by grooving the part of the floor/shelf in a direction away from the MB1 orifice. This is where two tools come in handy. The first is magnification with illumination (using loupes with a good LED light or a dental microscope),8 and the second is a surgical length (long), round, slow-speed bur or an endodontic ultrasonic with a broad tip. Both serve the same purpose. They aid in the removal of the dentin shelf in order to unroof the MB2 orifice. The direction of the grooving should be away from the MB1 canal and in a palatal direction. I’ve mentioned this already, but it needs to be stressed: If the tooth is very calcified, the MB2 orifice tends to be deeper. As such, you may need to groove, say, 2 mm to 3 mm (or more) apically.3
I must add that performing the above is not simple. If one grooves the floor in the wrong direction—too mesial or too distal—one may perforate the tooth. A common error is grooving the floor toward the palatal canal/orifice. One must never groove in that direction, as doing so would mean grooving the floor over the furcation and risking a perforation. And, of course, it will not help in locating the MB2 canal since it’s not located over the furcation. Instead, one must groove from the MB1 canal toward the palatal aspect of the tooth, not the palatal canal (Figures 6 and 7). If one grooves too mesially, he or she will risk perforating the mesial wall of the endo access.
 |
Good magnification and illumination is so important, as it helps visualize your landmarks and also in seeing if the floor is “blushing” from grooving too deep.
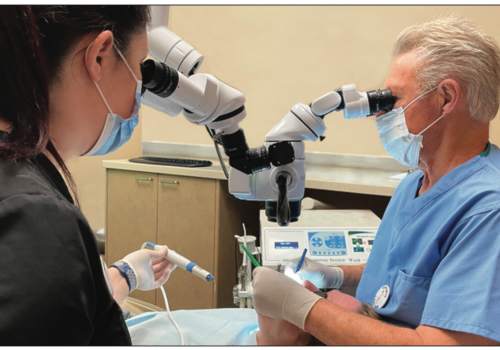
When using a slow-speed bur, the head of the handpiece will tend to obstruct the view of the bur tip. This may increase the risk of perforation, as one may be drilling and grooving blindly. On the other hand, a great benefit of an endodontic ultrasonic tip is that it makes it possible to visualize the ultrasonic tip when it’s grooving the dentin shelf. This, in turn, makes it possible to accurately groove the floor and reduces the risk of perforating the floor (Figures 8 to 10).
 |
The MB2 orifice is often very small and may be seen as a little black dot on the pulp floor. Since the MB2 tends to be calcified in heavily restored teeth, or in middle-aged and older patients, it can be difficult to negotiate. As such, it is recommended to start with small stiff hand files (.06, .08, and/or .10). Following the use of small stainless steel hand files, it is now recommended to use glide path NiTi mechanized files to further open the canals. In a February 2018 Dentistry Today article about managing calcified canals (“Clinical Tips for Instrumenting Calcified Canals”), I elaborated on instrumenting small canals.
Although the MB2 canal may be small, and often much smaller than the MB1 canal, it should still be fully instrumented. This often means instrumenting it to the same master size as the MB2.
IN SUMMARY
It goes without saying that a fundamental aspect of root canal treatment is that of treating all, not just some, of the canals in the involved tooth. As such, it is imperative to treat the MB2 canal in maxillary molars. One should expect to find the MB2 canal in nearly all maxillary molars. However, the canal is often difficult to locate and negotiate since it is often hidden under a dentin shelf and tends to be calcified. Having the right tools and knowing where to look for this infamous canal is the key to MB2 success.
References
- Hess W, Zürcher E, Dolamore WH. The Anatomy of the Root-Canals of the Teeth of the Permanent Dentition. New York, NY: William Wood; 1925.
- Vertucci FJ. Root canal anatomy of the human permanent teeth. Oral Surg Oral Med Oral Pathol. 1984;58:589-599.
- Hargreaves KM, Berman LH, eds. Cohen’s Pathways of the Pulp. 11th ed. St. Louis, MO: Elsevier; 2016:209-279, 324-386.
- Akbar I. Radiographic study of the problems and failures of endodontic treatment. Int J Health Sci (Qassim). 2015;9:111-118.
- Weller RN, Niemczyk SP, Kim S. Incidence and position of the canal isthmus. Part 1. Mesiobuccal root of the maxillary first molar. J Endod. 1995;21:380-383.
- Schwarze T, Baethge C, Stecher T, et al. Identification of second canals in the mesiobuccal root of maxillary first and second molars using magnifying loupes or an operating microscope. Aust Endod J. 2002;28:57-60.
- Buhrley LJ, Barrows MJ, BeGole EA, et al. Effect of magnification on locating the MB2 canal in maxillary molars. J Endod. 2002;28:324-327.
- Görduysus MO, Görduysus M, Friedman S. Operating microscope improves negotiation of second mesiobuccal canals in maxillary molars. J Endod. 2001;27:683-686.
Dr. Haas is a certified specialist with a full-time private practice limited to endodontics and microsurgery in Toronto. He is on staff at the University of Toronto Faculty of Dentistry and the Hospital for Sick Children. He lectures internationally and is one of Dentistry Today’s Leaders in Continuing Education. He is also a Fellow of the Royal College of Dentists of Canada. He can be reached via the website haasendoeducation.com.
Disclosure: Dr. Haas reports no disclosures.
Related Articles
Questions to Ask Prior to Root Canal Treatment
Managing Endodontic Emergencies
Root Canals Aren’t What They Used to Be


